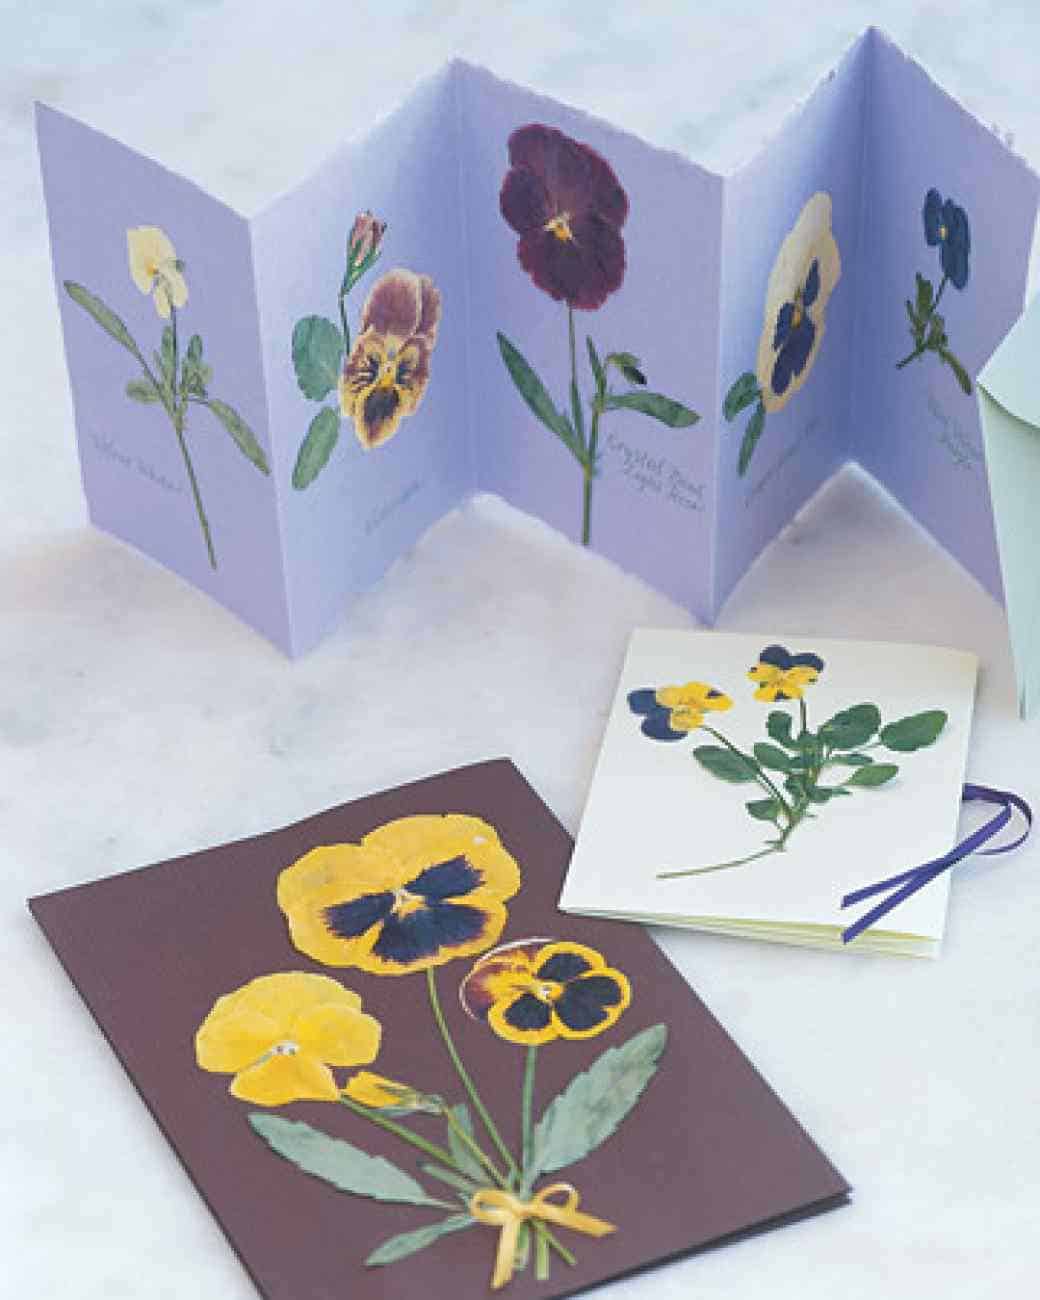
Crafts Made With Pressed Flowers
1. Cut 2 pieces of cardboard and 2 pieces of white paper to fit your press. The cardboard and paper should be slightly smaller than your press. 2. Cut the edges of your cardboard and paper off. Once the cardboard and paper are cut to size, cut away the corners so the paper and cardboard will sit inside the bolt holes.

42+ Easy Crafts for Adults to Make and Sell Crafts and DIY Ideas Arte de flor impressa
Flowers. The most essential element of any pressed flower project is, of course, the flowers themselves. You can use either fresh flowers or dried pressed flowers. If you are using fresh flowers, some varieties work better than others. Flowers with thin petals, such as pansies, daisies, and violets, work well.

Culture N Lifestyle CNL — Stunning Pressed Flower Art by Karly Murphy... Pressed flowers diy
Here are the steps for pressing in a book: Step 1 — First, sandwich your flower (or flowers, if you have a large book) between two pieces of paper, making sure it is laying as flat as possible. Then, close it in the pages of your book. Step 2 — You'll need to add more weight to ensure that the flower is pressed properly.

How To Press Flowers + Make a DIY Flower Press Pressed flowers diy, Pressed flowers, Diy flowers
Place flowers between 2 pieces of parchment paper (I like to first flatten the flowers as much as I can with a heavy item or book. Place the layers of paper on an ironing board and press the iron to the paper and leave it for 10-15 seconds. Make sure not to move the iron around. You want to leave it in one place.

How To Press Flowers For Your Arts And Crafts Projects DIY Projects
Here are the steps on how to make a pressed flower wine glass art: Take your glass and clean it with alcohol or water, making sure to remove fingerprint smudges and dirt. Towel dry after. Pour your resin mixture halfway on the bottom of the glass indentation. Choose small pressed flowers, Lay them on the resin.

How to Make a Flower Press and Display your Pressed Flowers Pressed flower crafts, Pressed
This DIY hanging pressed flower ornament mobile might be a bit of a mouthful to say, but it's certainly a winning craft project in our eyes! Twig and Toadstool loves the end result and we do too. By following the above tutorial from Twig and Toadstool, you can also make these pressed flower ornaments using clay.

40 Stunning Pressed Flower Art Ideas • Cool Crafts
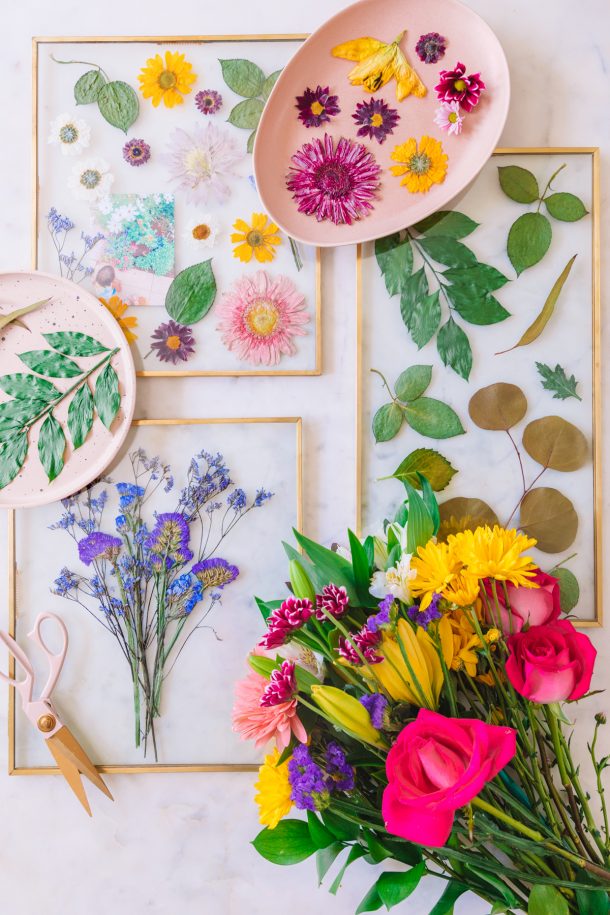
Step 2: Arrange flowers to be pressed. For a traditional pressing method, you can press flowers between the pages of a book, a photo album with acid-free paper sheets or a flower press. Gently arrange your flowers on the surface, opening up the petals to match how you'd like them to look once pressed. Once they are in a position that will look.

Dried Flower Art Pressed Flower Art Flowers Picture Herbarium Etsy Pressed flower art
Let's get crafting! 1. Pressed Flower Frames. With this simple diy, make a composition of all your favorite pressed flowers and hang them in any space as a work of art. This is a simple, straightforward diy that showcases gorgeous frames. For some extra fun, make a gallery wall of many frames all placed together. 2.

How to press flowers [Video] Pressed flower crafts, Pressed flowers diy, Pressed flower art
Place the parchment paper with the flowers in the microwave, then place a microwave-safe dish such as a plate on top of it. Using the lowest heat setting, microwave the flowers for 15 seconds at a time, checking on them in between each of the heat times until you are satisfied with their look. Learn four simple ways to press flowers and clever.

How to Press Flowers and 3 DIY Projects You Can Make With Them Pressed flower crafts, Pressed
4. Arrange the flowers. (Image credit: Clive Nichols) Press the main stem gently onto the blotting paper, tease stems apart and splay bit-parts out on the paper. 'Take time to arrange the flowers beautifully and unfold creased petals. The more time spent at this stage the better the end result,' says Amy.
How To Press Flowers in The Microwave Studio DIY
Check out these 15 DIY projects involving pressed or dried flowers that make perfect wedding gifts and delightful home decor. 1. Mandala sun catchers. Twig and Toadstool shows you hhow to carefully place pressed flowers in intricate patterns, held between two pieces of clear film by needlepoint hoops.

Handmade framed pressed flowers Pressed flower crafts, Pressed flower art, Pressed flowers diy
How to Press Flowers: 4 Methods for Pressing Flowers. Written by MasterClass. Last updated: Jul 20, 2021 • 4 min read. Pressing flowers is a fun and easy DIY project that preserves the natural beauty of fresh flowers. Pressing flowers is a fun and easy DIY project that preserves the natural beauty of fresh flowers.
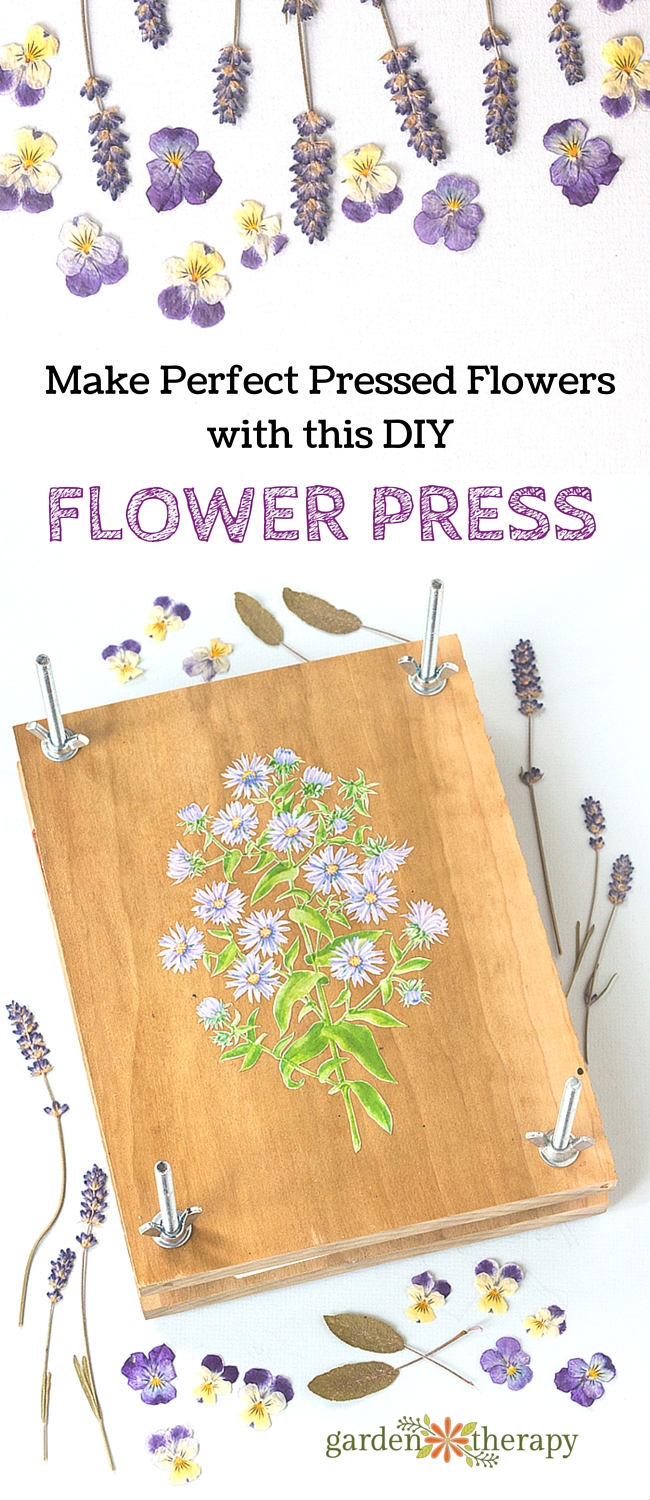
Woodworking for Gardeners Make a Handmade Flower Press Garden Therapy
Tighten the wing nuts, and press the flowers. flowers are inside the diy press being pressed. This whole drying process and pressing of the flowers will take about thirty days. For best results wait until the flowers are completely dry. Put your press in a warm dry location for the drying period.

How to Make Pressed Flower Frames Craft projects for every fan! Pressed flower art, Pressed
7. Pressed Flower Art. People pay a lot of money for botanical prints but you easily can make these for next to nothing. 8. Pressed Flower Suncatchers. Hang your beautiful specimens in the window with these easy to make suncatchers. An affordable yet stunning gift. 9. Handmade Paper Flower Jewelry Dish.

Woodworking for Gardeners Make a Handmade Flower Press Garden Therapy
Insert the bolts into the holes, from the bottom upwards, through one piece of wood. Stack the other wood on top. Then place a washer and a wing nut on each bolt. Your DIY flower press is done! To press flowers, place a layer of cardboard, then a layer of tissue paper on the bottom piece of wood.

Flower Press Kit Foundland
First, cut your wood to size (you can make your flower press any size you want!). I made mine approx. 8″x 10″. Then, with the two pieces of wood stacked together, drill a hole through each corner (all the way through both pieces of wood). Use sandpaper to smooth off any rough edges. Note: Make sure to choose a drill bit that is the same.
